If you have always shied away from fitting your locks yourself because you felt that you just can’t do it right, you are not alone. Read on for a detailed set of Yale keyless lock fitting instructions.
I bought a Yale keyless lock several days ago but I have not yet unpacked it. I am still debating on whether I should spend money on a professional locksmith to fit it for me. The lock seller insisted I can fit it myself. Is it really that easy?
Image courtesy of Pixabay
A keyless entry system is an electronic lock which allows access to a house or building without the use of a mechanical lock and key. The primary advantage of the system is that a user doesn’t need to carry keys to lock and unlock the door. A pre-set code entered on the keypad is the key.
Yale keyless locks come withfitting instructions which are supposed to guide a user through the installation process. Yale keyless lock fitting instructions vary slightly depending on the specific lock. Here are instructions on how to fit the Yale keyless digital lock.
You will need adrill bit, a screw driver and a small saw.
Put your key into your existing lock. Note if it turns left or right. You will need this detail later.
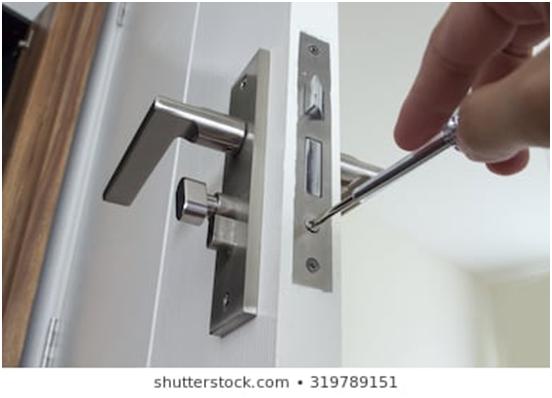
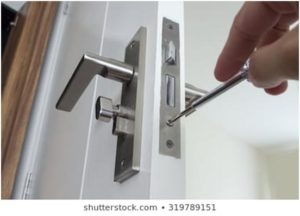
Remove the Old Lock
- Disassemble the existing lock by removing the screws holding the night latch case and those holding the mounting plate.
- Once the two are removed, you can now remove the outer part of the lock.
- Unscrew the screws holding the existing staple on the door frame and remove it.
Prepare the Door
- Cut off the fitting template on the installation guide. Be careful to cut along the dotted line to avoid cutting into the template.
- Position the template on the door. Make sure to line up the large hole on the template with the existing 32mm hole on the door.
- Locate the center of the smaller hole on the template. Use a marker to mark the exact point on the door that the small hole’s center aligns with. This is where the 15mm hole should be drilled.
- Use an appropriately sized drill bit to drill a hole at the marked point. Be sure to drill from both sides of the door and ensure that the hole is straight.
Fit the Lock
- Place the lock on the outside of the door, making sure the battery cable goes through the smaller hole and sticks out on the inside of the door. Let the connecting bar go through the 32mm hole and stick out on the inside.
- Use the template ruler to measure 17mm on the connecting bar from the door and mark this point using a marker. Make sure the bar is horizontal.
- Remove the lock and cut the connecting bar at the marked point using a small saw. Correct projection of the connecting bar is key to a properly working lock. Do not cut the bar shorter or longer than necessary.
- Position the lock back on the door. Use the self-adhesive pad provided to attach the extra handing plate on the fixing surface.
- The plate is marked ‘right’ on one side and ‘left’ on the other. Fix the plate based on your earlier made note on whether the key turns to the left or right. The side marked the correct direction text should be facing you.
- Use the template provided to pick out screws of the correct length based on the thickness of the door.
- Position the mounting plate over the tail bar and secure it with appropriate sized screws.
- Position the lock case on the mounting plate. Make sure the small bit of the connecting bar fits inside the slot at the back of the lock case.
- Use the 2 small screws provided to secure the lock case onto the mounting bar.
Fit the Battery Pack
- With the three pins of the cable facing upwards, connect the cable to the battery pack.
- Align the cable into the cable channel and then position it above the inner lock.
- Secure the battery pack in place using screws selected based on the door’s thickness.
Fit the Staple
- Close the door then use the lock case to guide you on exactly where the staple should be positioned on the door frame.
- Position the keep in place and secure it using appropriate screws.
You have now completed the lock installation process. Install the batteries provided and close the battery pack with its cover.
At this point it is imperative that you do not close the door until a PIN has been successfully set to enable you lock and unlock the door. If you close the door at this point you will not have a valid PIN to unlock the door and might end up locked out of your house.
Conclusion
Yale keyless lock fitting instructions have enabled many users install their own locks even with little or no technical expertise. Before you embark on an installation process, read through all the instructions carefully. Try to understand as much as you possibly can. Make sure you are clear on what each of the tools listed as requirements will be used for. Familiarize yourself with terms used to refer to different parts of the lock to avoid errors.
FAQ
I don’t have a saw. What else can be used to cut the connecting bar to the right length?
A pair of pliers will work well. Anything which will give you a smooth cut will be fine.
How do I know which screw to use?
Use screws with a length equal to the width of your door. You can use the template as a guide to figure out how long the screws should be.
Which is the best kind of screw driver to use when fitting a Yale keyless lock?
APhilips screw driver is best. Its cross shaped tip fits into similarly shaped ridges in the screws. A slotted screw driver will work best where screws have one strip-like ridge.
I need to re-install a Yale smart living keyless lock onto another door. I don’t have the template which came with the lock over a year ago.
You can find a template on an online installation guide here