If you are still skeptical about whether you can handle a Yale keypad lock installation, read on. Follow these instructions to the letter to install your lock. You will want to tap yourself on the back when you are done.
As a lock seller, I spend a lot of time convincing buyers that they don’t need to get a locksmith to install locks for them. Many are skeptical that they will be able to do it right even with no technical expertise whatsoever.
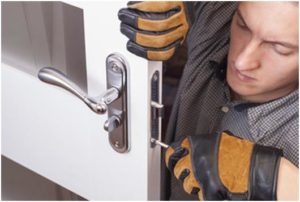
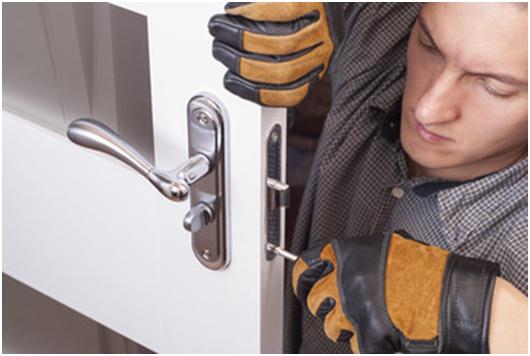
Image courtesy of Pixabay
Yale keypad locks come with installation instructions which you can use to install the lock yourself. The process is quite straight forward though it is best to read through the entire process before getting started. Small differences in features of different Yale locks make the details of installation vary slightly. Let’s look at how to install the Yale Real Living Touchscreen Deadbolt.
Assuming you have just purchased the lock, these are the items you will find in the box.
- Starter Guide
- Installation Directions
- Door Marker
- Bolt
- Strike Plate
- Inside Escutcheon
- Inside Mounting Plate
- Outside Escutcheon
- Battery Cover
- Batteries
- Screws
- Keys
Tools Required
You will require the following tools to prepare the door for installation of the lock.
- Hole saw
- Boring bit
- Drill bit
- Chisel
- Hammer
Once preparation is done, all you need is a Phillips Screw Driver(#2) for the actual installation.
Pre-Installation Process
The lock is packed in such a way as to demonstrate how it should be installed.
- First remove the screws on the battery cover. These screws should remain attached to the battery cover.
- Remove the battery cover by sliding it up and out.
- Remove the inside mounting plate, along with its gasket, from the back of the inside escutcheon.
- Leave the outside escutcheon, and its gasket assembled.
Installations Process
- Start by installing the bolt assembly. Make sure the bolt is fully retracted.
- Use 2 M4 x 25.4mm bolts to secure it in place.
- Install the strike plate on the door frame. Ensure the bolt hits the middle of the strike plate.
- Place the outside escutcheon on the hole in the door. ( ideal diameter for this hole is 1/8”)
- Allow the cable through the hole, ensuring it goes under the bolt.
- Hold the inside mounting plate in one hand and the cable in the other. Route the cable through the hole in the mounting plate.
- Insert the mounting plate’s tongue into the lower slot of the outside escutcheon.
- Hold the mounting plate in place using 2 M6 x 59.5mm pan head screws.
- Ensure the outside escutcheon and inside mounting plate are properly aligned.
- Place the inside escutcheon on the inner mounting plate. Maintain the tail piece in a horizontal position.
- Hold them in place using 3 M4 x 8mm screws which you drive through the inside escutcheon into the mounting plate. Be careful not to over tighten the assembly.
Test the mechanical working of the lock by operating the handle several times. Make sure the bolt responds to the handle. The bolt should extend into the hole in the door frame and retract smoothly.
Lock Handing
Handing of a door refers to how it swings in relation to the room it is used to secure. To determine if a door is right or left handed, stand on the outside of the room. Observe where the hinges of the door are. If they are on the left, then the door is left handed. If they are on the right then the door is right handed. The lock should be handed based on the handing of the door.
This Yale keypad lock automatically hands itself (determines if it should operate as a left or right handed lock) immediately the batteries are installed. It is important that you do not install the batteries until the entire Yale keypad lock installation process is complete. If batteries are installed before the lock is fully installed, it may hand itself wrongly. When this happens, you will have to complete the installation then reset the lock to factory default settings. This will make the lock hand itself a fresh.
Final Thoughts
Doing your Yale keypad lock installation yourself can be very fulfilling. It’s also a cost-effective way to go considering the expense that comes with calling in a professional locksmith to do the job for you. If you are installing an old lock onto a new door and don’t have access to the instruction guide it came with, look for one online. Be sure to follow the guide to the letter to avoid creating problems which might end up costing you more than professional installation to rectify.
FAQ
My Yale lock installation guide refers to the escutcheon. Which part is this?
Escutcheon is a word generally used to refer to an aesthetic plate used to cover a functional item. In reference to a lock, it is the part of the lockset which surrounds and protects the lock cylinder. It also protects the area from gradual damage when the end of the key misses the keyhole.
I have installed my Yale lock but the bolt doesn’t extend fully to a locked position.
The bolt and hole in the door frame may be misaligned. If so, you may need to remove and re-position the strike plate.
Should I install my Yale lock differently if my door is right handed?
The lock will work fine on either kind of door. A Yale keypad lock will automatically hand itself on installation. It doesn’t matter which side your door is handed.
How can I tell the screws apart?
Measure them. The number after the ‘M’ in its name indicates the diameter of the screw. The number after that tells you how long it is. For example an M4 x 8mm screw has a diameter of 4mm and is 8mm long.