When you have a smart lock, it is only natural to want to pair it with a voice assistant for better service. Many people have questions on the connect Nest x Yale lock to Alexa process, so we have written a step by step guide for you.
The advantages ofusing smart locks are numerous – they offer you improved security, and they are also easy to operate once you install them in your home. In addition, they also give you the chance to work with voice assistants, which is a cool addition to the featuresthey already have.
Among the famous voice assistants is Amazon Alexa, considered as a part of the ‘Big Three’ – and many people use it for their homes. However, not many might know the best ways to connect it to the Nest x Yale lock.
Does the Nest x Yale lock work with Alexa?
The compatibility of the Nest x Yale lock with Google assistant is not in question – it is very high and you rarely experience issues. However, Amazon Alexa is a different story, as you get the feeling that they both do not want the other to succeed because of the direct competition.
The lock itself does not work with Alexa at the moment, but you can work around that through the use of a third party app – Samsung SmartThings. Here is a step by step guide on achieving that.
What materials do I require?
- ZigBee or Z-Wave software in the Yale Lock (you can find the list of compatible locks in this list)
- an Amazon Alexa device
- Samsung SmartThings app and hub
You will need to download the app for SmartThings on Android or iOS, and set up the account, then download the Amazon Alexa app for any of the platforms and use your Amazon account to login.
Setting up the lock
- There are instructions that come with the manual to help you set up the lock, and then you can program your Master PIN code.
- Enroll the ZigBee or Z-Wave network module, although you should note its packaging comes separately from the Yale lock itself. Do this through:
- Removing the batteries and set the network modules
- Reinstall the batteries in the system
- There will be a Master pin code you need to enter to start (four to eight digits)
- Select the ‘Gear’ button
- Press ‘7’, ‘Gear’, ‘1’, then ‘Gear’, in that sequence
Connecting the lock to SmartThings
- Before starting this process, ensure you have installed the optional Network module in the lock
- Enter the SmartThings app, and select ‘My Home’.
- A menu will come up, select ‘Things’, then scroll to the bottom and select ‘Add a Thing’. Theapp should show you that it is searching for things.
- As the hub is searching, you can move the hub closer to the lock (ideally within ten feet). Ensure the lock stays awake throughout the process – if it is asleep, press any key to wake it
- Input the Master PIN code, and then follow it with ‘Gear’ or ‘#’
- Select ‘7’, ‘Gear’, ‘1’, then ‘Gear’ in that sequence
- The waiting time to activate the system will last up to a minute
- When the hub discovers the device, it will list it at the top. you can then tap on the device if you want to rename it, then select ‘Done’, ‘Save’ and ‘Ok’ to confirm. Pick a name you can remember easily.
Connecting Alexa
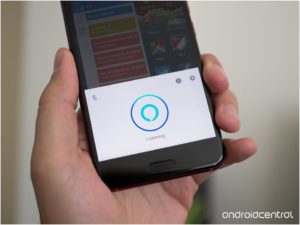
- Go to the Amazon Alexa app, then select the menu (the horizontal lines at the top left corner)
- Select ‘Smart Home’ and go to ‘Your Smart Home skills’.
- Select the option of ‘Get more smart home skills’, and a search field will come up. In the search bar, enter ‘SmartThings’ and enable it
- Log in through entering the SmartThings password and email
- A ‘From’ menu will come up, and you can then select your location
- To allow it to access your location, select ‘Authorize’. Note that if you want to change the devices Alexa can see, you can do this later through the SmartThings app.
- When the assistant is authorized, you will get a notification on the screen that notifies you of this
- You can then select ‘X’ to close the window
AllowingAlexa to find the lock
- Go to the Amazon Alexa app and select ‘Discover Devices’
- Wait until the process ends. It will discover your routines as well. Any discovered device will appear in its ‘Smart Home’ section.
Conclusion
Using Alexa with a Nest x Yale lock is very tricky because they do not typically work well together, but you can go around the problem through using SmartThings. While this makes the process longer, it is still worth it as the voice assistant will add convenience and security to the lock itself.
FAQs
What alternative hubs can work well with my Nest lock?
Theseare numerous, and include MyQ Smart Garage Hub, Philips Hue, Lutron Caséta, and Kasa hubs. These will add an extra layer of security and supplement the Nest lock itself in many ways.
Does the Nest work with all Yale locks?
Yes, as both have similar approaches to home security.
Do I require Nest Connect for a Yale lock?
Yes, since the Nest app cannot function effectively on its own. For it to be effective, you need to connect the app and lock together, then the app guides you through the installation steps.
Do all Nest locks use Z-Wave?
The answer is more complicated, as it is both no and yes. There are certain issues with compatibility, although you can use plugins to work around that issue.
Which is better between Z-Wave and ZigBee?
Both of these have similar applications, although the ZigBee is more versatile because of its applications in any short-range tasks. Z-Wave, on the other hand, is simpler to use because of the simpler protocols.