
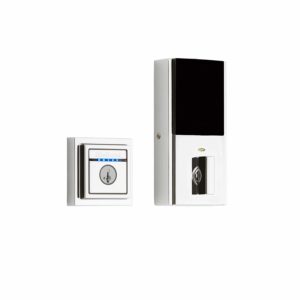
What do you do when your kwikset smartkey lock will not turn? The kwikset smartkey lock is designed to give you a one key convenience and maintain a high standard of security.
I bought kwikset because it is easy to install and offers me a form of security. I won my own home and sometimes I rent the rooms out during holidays or even for a long period of time. Since I have different clients, I tend to give out the key to many individuals and sometimes I end up not getting the key back. Lucky for me, I only need to rekey the locks to change the keys. Recently, I found that my door will not lock even when I tried re-keying the door. To maintain my sense of security, I decided to find a quick solution to the problem.
This is how you can fix your kwikset smartkey lock malfunction
I found that more hands on approach is to fix the kwikset smartkey manually. Start by disassembling the lock, it is easy and won’t take a lot of your time. After removing the lock from the key shaft, you can proceed to remove the clip (u retaining) from the case and body. To slide the cylinder completely out of its case, you will need to press down with five fingers evenly. Ensure you do this along its length. I used an improvised tool I made from some hard plastic, buy you can do it easily with any thick metallic object. Watch out for the check ball and ensure it is secure on one end and the finger lock is on the opposite before you completely slide it out.
Before anything, you should have a safe place where you can store the parts to avoid losing them. Safely store the finger lock and check ball security once you have removed them. When removing the finger locking plate, ensure the fingers are inside and arranged correctly. Do not taper with the spring that is behind the finger locking plate. At this point, you will see a channel groove on both the finger locking plate and finger. Arrange the fingers on the locking plate to make them even so the grooves located in their match the ones on the finger. Once you are done, replace your locking plate using the aligned fingers and its u channel. Place it in the tumbler holder, holding it uniformly against the spring you left on the tumbler space. This will actually place the tumbler into a perfect re-keying position.
While you are holding the assembly of the spring and tumbler body, pick up the finger locking bar and place it onto the locking plate. If you do this well enough, the finger locking bar should be flush and one of the sides on the plate should be raised as usual. Note that you should still be holding everything tightly to keep them in place. Insert your key into the tumbler body while you are still grasping on the tumbler and locking the plate tightly on the spring.
While you are still holding these parts, you can now add the check ball. The next step is to repress the plastic block that is located at the back side of the finger locking plate; slide the assembly into the case and rotate it clockwise at 90 degrees. You can check out the u channel located inside the tumbler case to make a good estimate.
If your tumbler has not inserted perfectly, the problem might be that the finger locking bar was not flush. You do not have to start over; you can re-do that section while maintaining a lock on the other assembly. Try to confirm that the finger is not poking out of the tumbler body. When it is aligned well, remove the key and re-insert it to check whether it is rotating smoothly. Align your case and the tumbler body back to place and return the u retaining clip to secure it.
Conclusion
After this experience, I still maintain my respect for this lock. The problem was fast and easy to fix. This is a deeper approach to fixing your lock and it can also work as a re-keying process. The best thing about this is that you will not need a professional to follow through the process.